Easy Beginner Eye Drawing Tutorial
Everybody wants to learn how to draw portraits of people. One of my earliest memories of drawing is from second grade. Our teacher had pictures of all the US presidents posted around the bottom of the classroom. I remember wanting to draw each one of them before the school year was over.
If I remember correctly, I think I got through about 4 or 5. I also remember getting a lot of attention from our teacher and other students for my drawings. To this day I can recall how good it felt to be recognized and praised for getting a good likeness of the president I was drawing.
To be able to successfully draw people, and more importantly, to show a good likeness of that person, you must be able to draw their eyes. At least at a level that is convincing. After all, we all know the eyes are the window to your soul. You can completely lose a likeness with the eyes.
But the good thing is eyes are fairly easy to draw. They are also very fun to draw and look cool as a stand alone work of art.
Eye Drawing Mistakes
One thing I noticed about many artists who are just learning to draw portraits is that the eyes usually seem to look “unnatural”. Something they all seem to have in common is that they are too straight and the lines all connect evenly without any overlap anywhere. Like this:
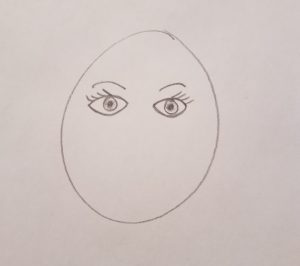
Why wouldn’t they look like this? When asked how to draw eyes, the quick response is to draw them like almonds or footballs. That makes sense I guess. The overall shape of the eye is an almond or football shape. But there is really much more to drawing the human eye than that. It’s not overly advanced or complicated. Just a little more in depth.
The next step in the simple explanation of how to draw eyes, is to add a circle in the center of your almond. After that, add a smaller circle inside of that for the pupil. Add some eyelashes and you have yourself a drawing of an eye. The problem is that the result of your drawing doesn’t look much like a real eye.
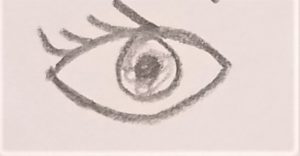
Of course, this is perfectly acceptable if this is the look you are going for, and maybe you are. Adding this style of eyes to a cartoon character can make them look charming and innocent. But since you are reading this tutorial, I’m going to assume you want to take your eye drawing to the next level. So let’s get started on today’s tutorial.
* Some of the links in this post may be affiliate links. This means I receive small commissions for purchases made through these links at no extra cost to you.
Art Supplies
- Paper
- Pencil
- Blending Stump
- Kneaded Eraser
How to Draw Eyes, Step-By-Step for Beginners
Step 1 – Reference Photo
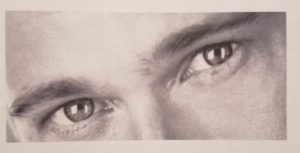
The very first thing you want to do is find yourself a good eye reference photo or real life reference to look at. We all want to be able to draw from memory without using a reference. But the reality is, very few artists are able to do this. Even the most successful artists use references for their work.
This is the reference photo I used for my final drawing. Notice that my reference photo is black and white. If you are making a pencil drawing, it’s easier to follow a black and white photo. The tones are much easier to see this way.
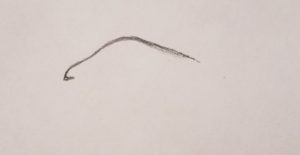
Step 2 – Draw the Upper Eyelid
Begin by drawing the upper eyelid. Pay close attention to the shape of the upper lid. Most of the time the lids will not be an even arch.
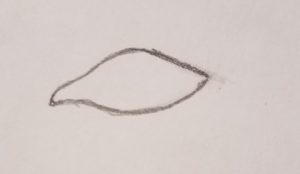
Step 3 – Draw the Lower Eyelid
Next, draw in the line for the lower eyelid. Again, pay attention to the shape of the lid.
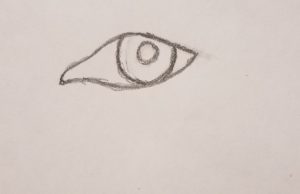
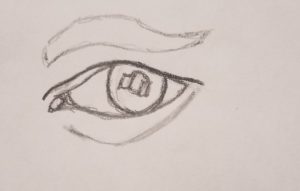
Step 4- Draw the Iris and the Pupil
Add the iris and the pupil to your drawing. Both should be drawn as circles. However, the iris will be partially covered by one or both of the eyelids. If you look at the reference photo I posted here, both the upper and lower eyelids slightly cover the iris. Another thing to keep in mind is that the iris isn’t always going to be in the exact center of the eye. The location of the iris will vary depending on where the subject is looking.
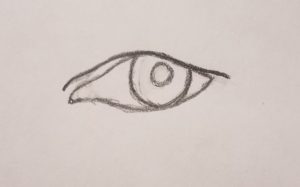
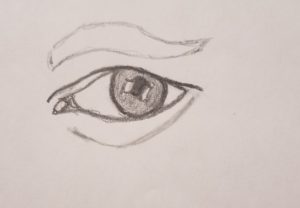
Step 5 – Add the Overlap of the Upper Lid
Draw the overlap for the upper eyelid, if one exists on the eye you are drawing. This will add a little more character to your drawing.
Step 6 – Add Extra Details to Your Eye Drawing
Add in the tear duct, shape of the eyebrow, highlights, and any wrinkle lines you want to include in your drawing. You can also rough in where you want to add some shading around the eye.
Shading an Eye
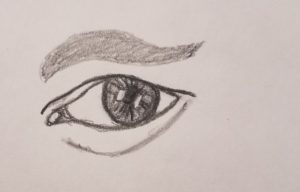
Step 7 – Shade the Iris
Shade in the iris using a pencil. I used a 4B pencil for my drawing. Avoid the area where you roughed in the highlights. How dark you shade should depend on the color of the iris. Darker brown eyes should be shaded a bit darker than blue eyes. Be careful not to go too dark though.
Step 8 – Shade in the Eyebrow and Add More Detail to the Iris
Add some base tone to the eyebrow. In the next step you will add in the lines for the hairs of the eyebrow. You also want to add in some darker lines for the detail in the iris. When you add in the darker lines, you want to be sure your lines are radiating out from the pupil.
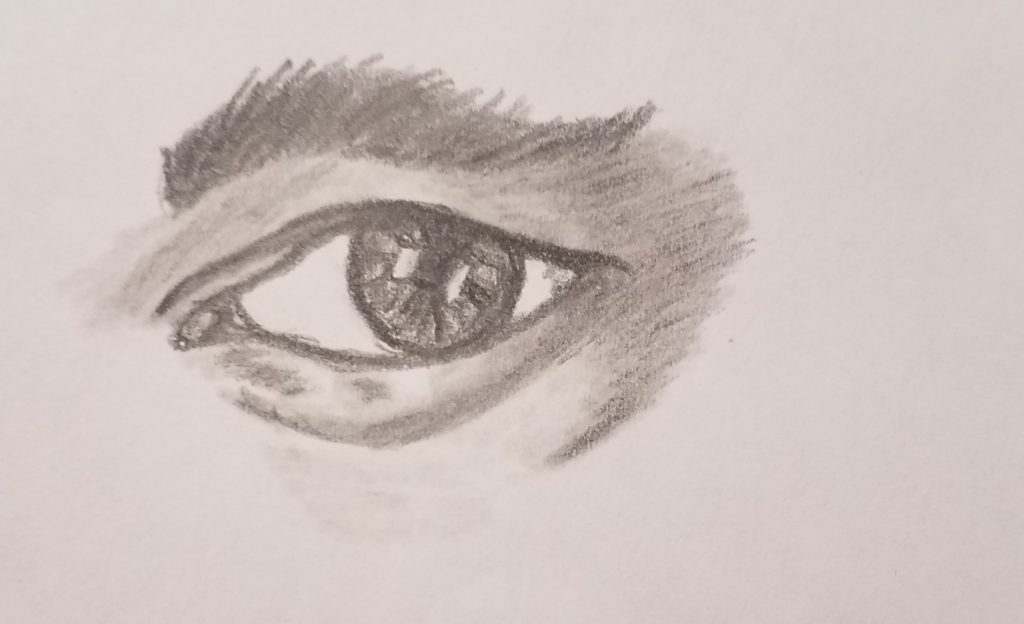
Step 9 – Shade and Add Final Details
In the final step you want to add in some detail to the eyebrow. Draw some individual lines for the eyebrow hairs. Add some shading around the eye, making some areas darker than other. Use your reference to guide you. I used a blending stump to soften my lines on the skin. For the upper eyelid I made the line a little darker and thicker. You should add a little bit of a shadow on the upper part of the eyeball where the upper lid casts a shadow. Here’s my finished eye drawing.
How to Draw Eyes for Beginners
The only way to improve is to practice. The best way to become more creative is through repetition. Try to come up with some fun ways you can practice without making it boring. The more eyes you draw, the better you will get.


To say that I’m TERRIBLE at drawing is a huge understatement. But after following the instructions, I was surprised at how well it turned out. I really enjoyed this lesson. The instructions and steps were very simple and easy to follow. The only difficulty I experienced was the detail around the Iris. I wasn’t sure of what shapes to draw around or on the Iris to make it look moist. But it still worked.
Thank you for your feedback Jonathan. I will revisit the lesson and work on making it clearer.